Like most Microsoft products, there are many ways to look at or perform the same activities. Azure DevOps is no different. It may be slightly confusing when you first start using the tool, and if you haven’t used it in a while, you may need to reacclimate yourself with the available view options.
Work Items
When you want to see a list of all work items, this view will show you everything on the list, regardless of hierarchy or work item type. In almost all the views, you can filter on various categories to narrow down your list.
From this view, you can add a new work item of any available type – whereas on other boards, you are limited to which types of items you can add. I don’t find this view to be useful since I’m usually not a development team member, but if you wanted to see items that were assigned just to you, this might be the best choice for viewing them.
Boards
The boards view is one that I have come to appreciate more and more over time. This wasn’t a view I used often in my early use of this tool. But, as my projects became larger and more complex, this view became an effective view for managing the workflow of items in the product backlog. The boards view is pretty much Azure DevOps’ take on a Kanban board.
In the boards view, you can set up custom columns with work in progress (WIP) limits and color coding. You can also set up swim lanes, which can be used to separate work by sprint (or whatever else you want). The different columns on the boards view can act as triggers for the next step in the workflow process.
Custom columns can also be mapped to the standard statuses a product backlog item can be in, and the status will change automatically as cards are moved across the board. When an item is marked as done in any other view, it automatically moves to the Done column on the boards view.
Backlogs
Depending on which process template you are using, you will see slightly different options on the backlogs view. The thing I like about this view is that you can choose what level you want to look at and can expand and collapse the view. If I’m doing backlog refinement with my team, I tend to use the User Story or Work Item view. If I’m doing higher-level planning for releases, I usually look at the epic and feature levels.
Sprint
The Sprint view is the one I spend the most time in with my team. We do an activity we call “walk the board” in our Daily Scrum rather than the standard three questions (which were removed from the Scrum Guide 2020 update).
We either filter by a person’s name or walk straight down the board from top to bottom. Adjustments may be made ad-hoc during the call. As a Scrum Master, I regularly “troll” the board to see what progress is being made, looking for impediments, blockers, bottlenecks, and so on.
Configure Your Views
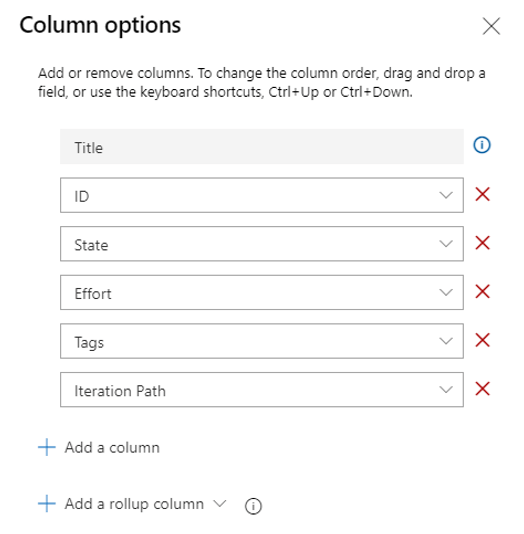
On most views, you can also adjust the column options you want to see on the screen. One thing I usually hide is the work item type because the types are visually identified by the color and symbol associated with each type. You can add or remove most available fields in the system, which is useful if you’re trying to discover something specific.

Filtering
Filtering is helpful if you’re trying to find something specific.

One tip on filtering is to remember if you have a view filtered. If you forget, you may get confused by what you see on the board because it will appear as though things are missing. Make sure you filter with intention and make it a habit to clear filters when you find the information you are looking for.
As you use Azure DevOps, the use of the different views and boards will become more intuitive. It does take a while to get used to what each view is for and when you should use it. Don’t worry, though! As I mentioned at the start of this blog, there’s usually more than one way to accomplish the goal for most common tasks.


Share on