If you read my first blog about Azure DevOps, then I hope you’ll continue to tune in as I cover many different tips and tricks for using this popular Microsoft tool.
The topic for today is Area Paths. Are you even aware that this feature exists? Do you know what it is and how it can be used? If not, read on…
Area paths – to use, or not to use?
Depending on the complexity of the project you are working on, the size, or the need to track different sub-projects, channels, or features separately, you may want to consider using area paths before you start setting up your sprints.
The last project I worked on ended up being far more complex than was originally thought (it turned out to be a program with three projects included in one, rather than just one project). I did not originally set the project up to use area paths. It’s my general opinion that it increases complexity to use area paths and can be confusing to development team members unless they are properly educated on their use. That said, it was necessary to use area paths on this project so I could more easily report on distinct portions of the program.
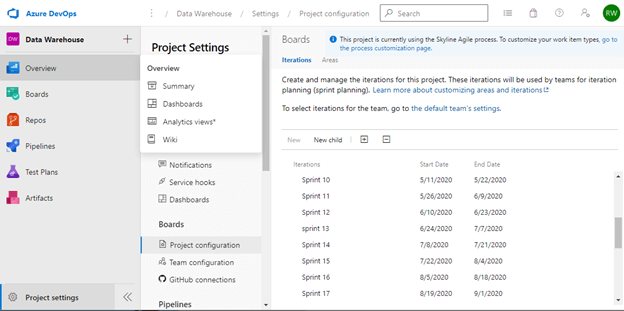
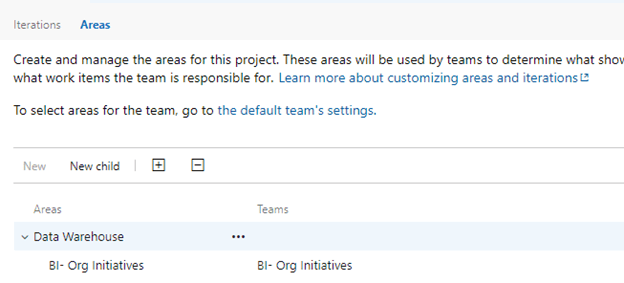
The process to set up area paths is very similar to setting up sprints or iterations. Go to your project settings icon (the gear wheel). Then choose Project Configurations, and at the top, click on the link for “Areas”.

Make sure you use the root project, then select “New Child” and give it a name. Then save and close and add any other necessary area paths.

Once these are established, you will need to assign each new backlog item to the appropriate area path. If you forget to do this, or get lazy, then area paths will lose their accuracy and value, so make sure you are consistent in assigning area paths.
Again, my advice is to use area paths only if there is a compelling reason to. In a couple weeks, I’ll share the next installment in this series: Sprints.


Share on